

Dental Implant Components Explained: A Practical Guide for GDPs

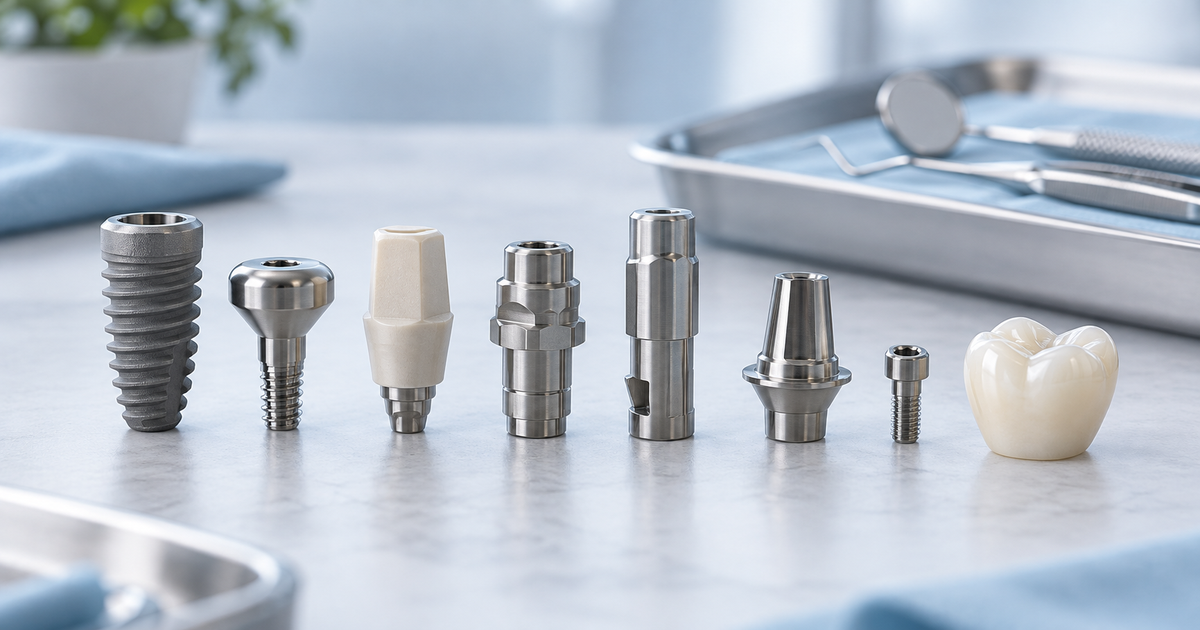
Dental Implant Components Explained: A Practical Guide for GDPs
If you are comfortable with crowns and bridges but new to implant restoration, the terminology can make the workflow feel more complicated than it is.
A conventional crown has a tooth preparation. An implant crown sits within a system of precisely manufactured components, and each component has a specific job.
The key is not to memorise a catalogue. It is to understand the chain from the implant in bone to the final restoration, know which restorative level you are working at and confirm that every component is compatible with that particular implant system.
This guide explains the dental implant components a general dentist is most likely to encounter when restoring a straightforward single implant crown.
Start with the restorative chain
Think of the restoration as a sequence:
Implant fixture → healing component or provisional restoration → impression coping or scan body → laboratory analogue or digital library → abutment/Ti-base and prosthetic screw → definitive crown
Not every case uses every component, and manufacturers use different terminology. However, understanding this sequence makes conversations with the surgeon and dental technician much easier.
1. The implant fixture
The implant fixture is the component placed surgically into the bone. It provides the foundation for the restoration and contains the restorative connection at its coronal aspect.
For the restorative dentist, simply knowing that “there is an implant at UL5” is not enough.
You should be able to identify:
• Implant manufacturer
• Implant family
• Restorative platform
• Implant connection
These details determine which healing components, impression copings, scan bodies, screws and restorative components are compatible.
If the implant information is uncertain, resolve it before ordering or attaching restorative components. Similar-looking parts are not necessarily interchangeable.
2. The restorative connection and platform
The connection is the mechanical interface between the implant and the component above it.
Common systems use internal conical, internal hex or other proprietary geometries. The platform describes the relevant restorative interface or diameter category.
This matters clinically because the wrong platform or connection may not seat correctly, may damage components or may create an inaccurate impression.
It is one reason the implant passport, surgical correspondence and laboratory prescription should contain precise implant information.
3. Cover screw and healing abutment
A cover screw seals the implant connection during submerged healing.
A healing abutment projects through the mucosa and protects the connection during transmucosal healing while helping to shape the peri-implant soft tissues.
When you begin the restorative phase, you will commonly remove a healing abutment and replace it temporarily with a scan body or impression coping.
Keep the field organised, protect small components from aspiration and make sure the correct healing component is replaced when the appointment is complete.
4. Scan body
A scan body is the digital transfer component.
It has a precisely known geometry that allows CAD/CAM software to determine the three-dimensional implant or abutment position from an intraoral scan.
For an accurate digital implant impression, the scan body must be:
• Compatible with the implant system
• Fully seated
• Correctly orientated where required
• Adequately captured within the intraoral scan
A visually impressive scan cannot compensate for a scan body that is sitting proud of the connection.
Related guide: What Is an Implant Scan Body? A Practical Guide for Dentists
5. Impression coping
An impression coping performs the equivalent transfer function in a conventional implant impression.
It attaches to the implant or restorative abutment so that its position can be reproduced accurately in the laboratory model.
Closed-tray transfer copings are generally removed from the mouth after the impression and repositioned into it.
Open-tray or pick-up copings remain locked into the impression when it is removed.
The precise workflow is system-specific.
Related guide: Digital vs Conventional Implant Impressions: What Should GDPs Know?
6. Implant analogue
An implant analogue reproduces the implant or abutment connection within a physical working model.
It is attached to the impression coping before the model is poured, allowing the dental technician to work with a laboratory representation of the intraoral implant position.
In a fully digital workflow, the equivalent information is handled by the scan-body geometry and corresponding digital library rather than by physically transferring a coping to an analogue.
7. Abutment, Ti-base and restorative interface
An abutment connects the implant to the prosthetic restoration.
Depending on the design, the crown may be cemented onto a separate abutment or may form part of a screw-retained restoration.
Many contemporary CAD/CAM workflows use a titanium base, often shortened to Ti-base, as the precision titanium interface between the implant and a laboratory-manufactured ceramic or zirconia suprastructure.
The exact component design varies considerably between implant systems.
8. The prosthetic screw
The prosthetic screw clamps the restoration or abutment to the implant.
When tightened according to the manufacturer’s specified protocol, the screw is stretched elastically and produces preload within the screw joint.
The correct screw, driver and torque protocol matter.
“Tight” is not a reproducible clinical measurement.
Use the specified instrument and current manufacturer instructions rather than relying on hand feel or a remembered torque value from another implant system.
9. The implant crown
The final crown restores anatomy, contact points, emergence profile, aesthetics and function.
It may be screw-retained or cement-retained, with different advantages and limitations relating to retrievability, aesthetics, prosthetic space and cement control.
Fitting the crown is not simply a conventional crown fit appointment with a screwdriver added.
You need to:
• Confirm that the restorative interface is fully seated
• Assess proximal contacts and emergence profile
• Check the occlusion
• Apply the correct torque protocol
• Seal the screw access appropriately where relevant
What should a GDP be able to identify before restoring an implant?
Before starting, aim to answer five questions:
- What implant is present?
- At what restorative level am I working?
- Which transfer component do I need?
- Which final restorative components are planned?
- What is the manufacturer’s current fitting protocol?
If you can answer those confidently, the component list stops looking like a box of unrelated metal parts and starts becoming a logical restorative workflow.
A simple chairside implant component checklist
Before proceeding with restoration:
• Confirm the implant manufacturer, implant family, platform and connection
• Verify component compatibility
• Confirm complete seating before scanning, impression taking or final torque
• Use the correct driver
• Follow the manufacturer’s current torque protocol
• Record component and torque information in the clinical notes
• Retain enough information for another clinician to identify and maintain the restoration in the future
Related Engage reading
What Is an Implant Scan Body? A Practical Guide for Dentists
https://www.engageimplant.co.uk/blog/what-is-an-implant-scan-body-a-practical-guide-for-dentists
Digital vs Conventional Implant Impressions: What Should GDPs Know?
https://www.engageimplant.co.uk/blog/digital-vs-conventional-implant-impressions-what-should-gdps-know
Want to put this into practice?
Engage One is designed for GDPs who want to become comfortable handling implant restorative components rather than simply seeing them on a slide.
During the hands-on course, you will:
• Identify the key components in a single implant workflow
• Place scan bodies and conventional impression components
• Fit a screw-retained crown
• Use a torque driver correctly
• Verify seating
• Assess occlusion
• Seal the screw access cavity appropriately
Want to become more confident restoring straightforward implant cases?
Explore Engage One →
References and further reading
General Dental Council — Scope of Practice
https://www.gdc-uk.org/standards-guidance/standards-and-guidance/scope-of-practice
Engage Implant — What Is an Implant Scan Body?
https://www.engageimplant.co.uk/blog/what-is-an-implant-scan-body-a-practical-guide-for-dentists
Engage Implant — Digital vs Conventional Implant Impressions
https://www.engageimplant.co.uk/blog/digital-vs-conventional-implant-impressions-what-should-gdps-know
Wittneben et al. — Screw-retained vs cement-retained implant-supported fixed dental prostheses
https://pubmed.ncbi.nlm.nih.gov/28000276/
Clinical note: This article provides general educational information for dental professionals. Implant components, tightening protocols, impression procedures and restorative workflows vary by manufacturer and clinical situation. Always work within your personal competence and indemnity, use current manufacturer instructions and refer when appropriate.